
The importance of propellers in a drone’s functionality is huge. These rotating blades create the necessary thrust to lift the drone off the ground and keep it airborne.
Additionally, they play a crucial role in maintaining stability and maneuverability, allowing you to control the drone with precision.
As drone propellers endure numerous flights, encounters with obstacles, and exposure to the elements, they gradually deteriorate.
As propellers wear down, their performance begins to decline. The efficiency of lift generation may decrease, leading to reduced flight times and limited payload capacity.
Ignoring signs of propeller wear can lead to unpredictable drone flight behavior, decreased control, and even accidents. To ensure safe and enjoyable flights, it’s essential to regularly inspect and replace propellers as needed.
Fortunately, the process of replacing drone propellers is relatively simple, even for beginners.
By following a few fundamental steps and employing some basic tools, you can effectively maintain your drone’s propellers and extend the overall lifespan of your equipment.
This guide aims to provide you with a comprehensive understanding of the propeller replacement process, equipping you with the knowledge needed to perform this vital maintenance task confidently.
Steps to Replace Drone Propellers
Get Replacement Propellers
The first step in replacing drone propellers is acquiring the correct replacements.
Drone propellers come in various sizes and types, so it’s important to choose the ones that are compatible with your specific drone model. Consult your drone’s user manual or manufacturer’s website to determine the correct propeller specifications.
Once you have this information, you can easily find replacement propellers from reputable drone suppliers or online retailers.
It’s recommended to purchase propellers from the same manufacturer to ensure compatibility and optimal performance.
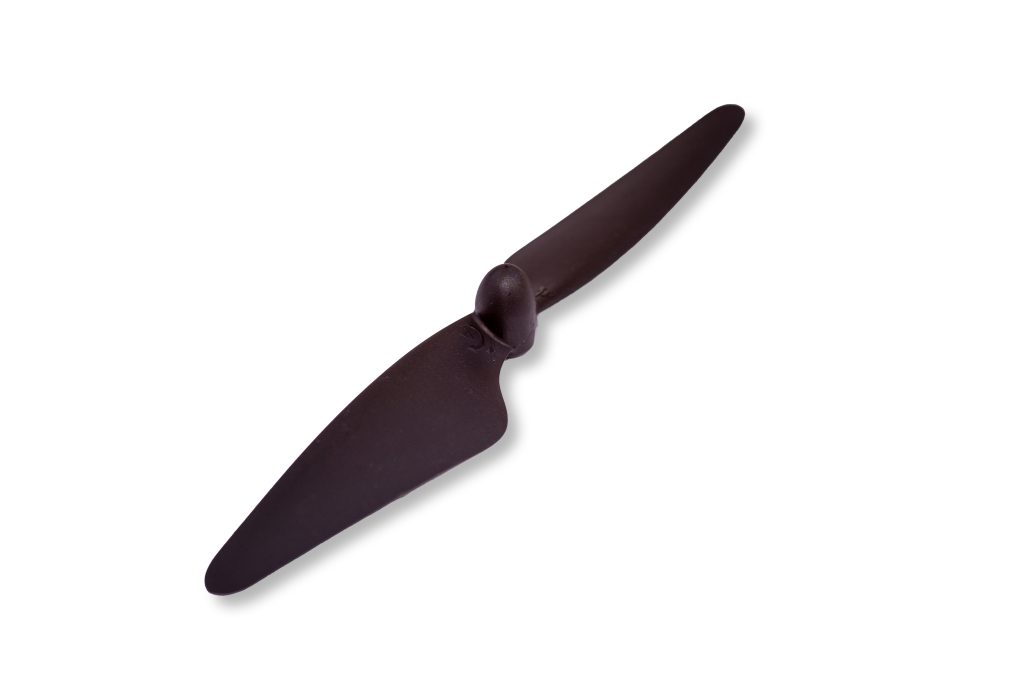
Remove the Old Propellers
As a drone pilot, you should know how to remove the drone propeller. But before removing the old propellers, it’s essential to power off your drone to avoid any accidental rotation or damage.
Once the drone is safely powered off, visually inspect the propellers to identify which ones need replacement.
Most drones have propellers labeled with letters (A, B, C, D) or colors to indicate their position. Using this labeling system, locate the propellers that require removal.
To remove the old propellers, you will need a propeller removal tool or a screwdriver. Attach the tool to the propeller nut, which is located at the center of the propeller. Turn the nut counterclockwise to loosen it.
Be careful not to apply excessive force to prevent damage to the motor or propeller.
Once the nut is loose, you can unscrew it by hand and gently slide the propeller off the motor shaft. Repeat this process for each propeller that needs replacement.
Loosen the Propellers
To ensure a secure fit for the new propellers, it’s important to ensure that the motor shafts are clean and free from any debris or residue.
Use a clean cloth or brush to wipe away any dirt or dust from the motor shafts.
Inspect the motor shafts for any signs of damage, such as bends or dents. If you notice any significant damage, it’s advisable to consult a professional or contact the manufacturer for further assistance.
With the motor shafts cleaned and inspected, it’s time to attach the new propellers.
Install new propeller
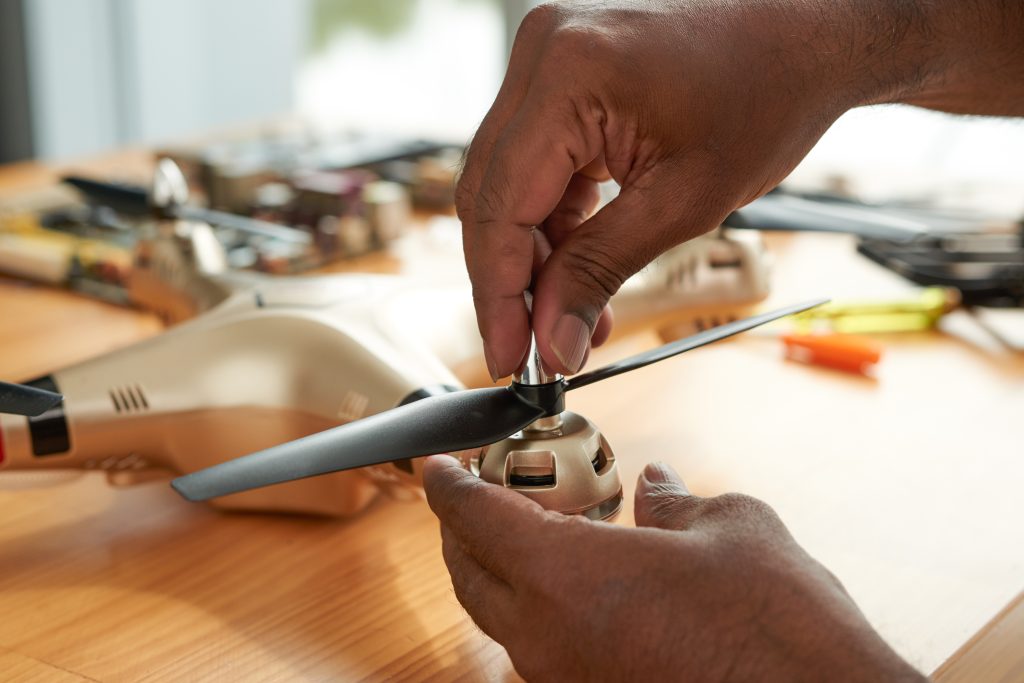
Align the mounting hole on the propeller with the motor shaft, and ensure that the propeller rotates in the correct direction (clockwise or counterclockwise). Gently push the propeller onto the motor shaft, making sure it sits flush against the motor housing.
Hand-tighten the propeller nut onto the motor shaft by turning it clockwise. This will provide a firm attachment, ensuring that the propeller stays in place during flight.
It’s important to avoid excessive tightening, as it can put unnecessary stress on the motor or cause damage to the propeller.
To give the nut a final tightening, you can use a propeller removal tool.
This will help strike a balance between stability and flexibility, allowing for adjustments if needed while ensuring the propeller remains securely fastened.
For convenience, see the video below on changing the propeller.
How tight should the new drone propeller be?
The new drone propeller should be tightened enough to ensure a secure connection, but it’s crucial to avoid over-tightening. Hand-tightening the propeller nut onto the motor shaft is generally sufficient for achieving a secure fit.
It should be tight enough to prevent the propeller from becoming loose during flight but not excessively tight.
Over-tightening can lead to unnecessary stress on the motor or even cause the propeller to crack or break.
By following the hand-tightening approach and ensuring the propeller sits flush against the motor housing, you can achieve the appropriate tightness for the new drone propeller.
Testing the newly added propeller
After installing the new propeller, it is essential to test its performance before proceeding with regular flight operations.
Start by powering on the drone and running a propeller test.
Observe the propeller closely and listen for any abnormal vibrations or unusual sounds. These signs could indicate an improper installation or an issue with the propeller itself.
If everything appears normal during the test, proceed to conduct a test flight in a controlled environment.
Pay close attention to the drone’s behavior during takeoff, hovering, and maneuvers to evaluate the stability and performance of the newly added propeller. Ensure that the propeller operates smoothly, contributing to the overall stability and control of the drone.
Address any issues or anomalies that arise during testing before proceeding with regular flight operations, as this will help ensure a safe and enjoyable flying experience.
How to Keep the Propeller in Good Condition?
To keep propellers in good condition, there are several key practices you can follow:
Regular Inspection
Routinely inspect your propellers for any signs of wear, damage, or deformation. Look for cracks, or bent blades.
If you notice any issues, it’s important to replace the propeller promptly to maintain optimal performance and flight safety.
Cleaning
Clean your propellers regularly to remove dirt, debris, and residue that may accumulate during flights.
Use a soft brush or cloth to gently wipe down the propeller blades and remove any particles that could affect performance.
Balanced Propellers
Ensure that your propellers are properly balanced.
Imbalanced propellers can cause vibrations that may impact the stability of your drone during longer flight times.
Use a propeller balancing tool to check and correct any imbalances if necessary.
Avoid Collisions
Take precautions to avoid collisions or impacts with obstacles. Collisions can cause significant damage to propellers, leading to imbalances or even breakage. Fly your drone in open areas away from potential hazards to minimize the risk of collisions.
Follow Manufacturer Guidelines
Refer to your drone’s user manual and follow the manufacturer’s guidelines regarding propeller maintenance and replacement intervals.
Manufacturers often provide specific instructions and recommendations for propeller care and replacement based on their design and specifications.
Proper Handling
Handle propellers with care, especially during installation and removal. Avoid excessive force or torque that could damage the propeller or the motor.
Follow the recommended tightening procedures to ensure a secure fit without over-tightening.
By following these practices, you can keep your propellers in good condition, ensuring optimal performance and prolonging their lifespan. Regular maintenance and care will contribute to safer and more enjoyable drone flights.
When to Replace a Propeller

Knowing when to replace a propeller is crucial for maintaining optimal drone performance and flight safety.
Here are the key factors to consider, listed in numerical order, to determine when it’s time to replace your propeller:
Visible Damage
Regularly inspect your propellers for any visible signs of damage, such as cracks, chips, or significant deformation. Damaged propellers can negatively impact flight stability and safety, so if you notice any of these issues, it’s crucial to replace the propeller immediately.
Excessive Wear
Over time, propellers can wear down due to normal use, impacts, or contact with objects.
Look for signs of wear, such as worn-out blade edges or reduced thickness compared to a new propeller.
If the propeller appears significantly worn, it may not generate sufficient lift or perform optimally, which can impact flight stability and maneuverability. Replacing the propeller will help restore peak performance.
Imbalance
Imbalanced propellers can cause vibrations that affect flight stability and potentially damage other drone components.
If you notice excessive vibration or shaking during flights, even after balancing the propeller, it may indicate an inherent issue with the propeller itself. In such cases, replacing the propeller is necessary to ensure smooth and stable flight performance.
Poor Performance
If you experience decreased flight time, reduced maneuverability, or an inability to maintain a stable hover, it could be a sign that the propeller’s efficiency has significantly decreased.
A worn-out or damaged propeller may not generate sufficient thrust, leading to suboptimal flight characteristics. Replacing the propeller can restore the drone’s performance and ensure a more enjoyable flying experience.
Manufacturer Recommendations
Manufacturers often provide guidelines on propeller lifespan or specific replacement recommendations based on their design and specifications.
These guidelines consider factors such as material fatigue, performance degradation, and safety considerations.
Consulting your drone’s user manual or the manufacturer’s recommendations is essential for understanding the recommended replacement intervals.
After Collisions or Accidents
After any collision or accident, it is crucial to inspect the propellers for damage or deformation. You might find you have a broken propeller after a collision or accident.
However, even if the damage is not immediately noticeable, it’s advisable to replace the propellers as a precautionary measure.
Collisions can lead to hidden structural damage that may affect the propeller’s performance or stability during flight. Replacing the propellers will help ensure continued flight safety and reliable operation.
Cracks
Cracks in propellers are a significant concern as they can compromise the structural integrity of the propeller blade.
Inspect your propellers carefully for any cracks, especially along the edges or near mounting holes.
Even hairline cracks can indicate internal damage that may worsen over time and potentially result in catastrophic failure during flight.
To ensure flight safety, it’s crucial to replace any propellers with cracks promptly.
Odd Noises
Unusual noises originating from the propellers during flight, such as clicking, scraping, or grinding sounds, should not be ignored. These sounds may indicate internal damage, loose components, or misalignment.
It is advisable to power off the drone and thoroughly inspect the propellers for any visible damage or foreign objects.
If the cause of the odd noise cannot be identified or resolved, it is recommended to replace the propellers to prevent potential failures or accidents.
Remember, regular inspection and maintenance are key to identifying when propellers need replacement. It’s always better to err on the side of caution and replace propellers earlier rather than risk compromising flight safety or drone performance.
FAQs – How To Replace Drone Propellers?
Q: Why do I need to replace my drone propellers?
A: Drone propellers can wear down over time due to usage, impacts, or exposure to the elements. Replacing propellers is essential for maintaining optimal flight performance, stability, and safety.
Q: How often should I replace my drone propellers?
A: The replacement frequency depends on various factors, including usage, manufacturer recommendations, and signs of wear or damage. It’s recommended to change propellers after 200-300 flights.
Q: Can I replace my drone propellers with any brand or model?
A: No, you should replace it with the same model. It’s important to choose propellers that are specifically designed for your specific drone model.
Q: How do I know which propellers to purchase as replacements?
A: Refer to your drone’s user manual or manufacturer’s website for the specific propeller specifications. These resources will guide you in selecting the right propeller for your drone model.
Q: Can I replace a single propeller, or should I replace them all at once?
A: It’s generally recommended to replace all propellers together to maintain balanced flight characteristics. However, if only one propeller is damaged, you can replace it individually. But a lot of time, manufacturerers recommend replacing both the propeller; even if one is damaged, the other one is fine to avoid some unnecessary circumstances. Just ensure the replacement matches the remaining propellers in terms of specifications.
Conclusion
In conclusion, the propellers of a drone are crucial components that greatly impact its functionality and performance.
Regularly inspecting and replacing propellers is essential for maintaining optimal flight safety and ensuring a pleasant flying experience.
Visible damage, excessive wear, imbalances, poor performance, adherence to manufacturer recommendations, and post-collision assessments are all key factors to consider when determining when to replace propellers.
When propellers are damaged, worn, or imbalanced, they can negatively affect flight stability, maneuverability, and overall performance. This can lead to reduced flight times, limited payload capacity, vibrations, and even unpredictable flight behavior.
By promptly replacing propellers showing signs of wear or damage, you can maintain optimal flight characteristics and reduce the risk of accidents.
Following manufacturer guidelines is essential, as they provide specific recommendations based on propeller lifespan, material fatigue, and safety considerations. Manufacturers are knowledgeable about their products and offer valuable insights into when to replace propellers to ensure continued performance and safety.
Additionally, after any drone crash or accident, a thorough inspection of propellers is crucial. Even small cracks or warping can compromise the structural integrity of the propeller and impact flight stability.
Also, to keep propellers in good condition, regular inspection, cleaning, balanced propellers, avoiding collisions, and following manufacturer guidelines are essential.
Finally, Understanding when to replace propellers and following proper maintenance procedures are crucial for safe and enjoyable drone flights.