What is Trim on a Drone? Trim on a drone refers to the process of adjusting the control surfaces to achieve stable flight and maintain a desired position.
Drones, like any aircraft, rely on control inputs to maneuver through the air. However, due to various factors such as manufacturing tolerances, wind conditions, and weight distribution, a drone may not fly perfectly straight and level with neutral control inputs.
Trimming a drone involves making small adjustments to the throttle, yaw, pitch, and roll controls to compensate for any imbalances or deviations from stable flight.
These adjustments help achieve a state where the drone maintains its desired position without the need for constant input from the pilot.
Throttle trim adjusts the drone’s vertical stability, ensuring it maintains a consistent altitude. Yaw trim adjusts the rotational stability, preventing the drone from drifting or rotating unintentionally.
Pitch and roll trim adjustments fine-tune the drone’s horizontal stability, allowing it to maintain level flight and straight-line movement.
Trimming a drone is typically done through the drone’s flight controller or transmitter. It often involves observing the drone’s behavior during flight and making small incremental adjustments until the desired stability is achieved. Visual cues, such as the drone’s orientation and response to control inputs, can help determine the necessary trim adjustments.
Properly trimmed drones are easier to control, more stable in flight, and require less effort from the pilot to maintain a desired position. It is an essential step in optimizing the flight performance of a drone and ensuring a smooth and enjoyable flying experience.
Why Do Drones Have Trimming?
Trimming a drone is particularly crucial for cheaper or budget drones that may not have advanced stabilization systems or sophisticated flight controllers.
These drones often rely heavily on manual remote control inputs, making trim adjustments even more significant.
Cheap drones may exhibit greater sensitivity to imbalances or deviations, resulting in erratic flight behavior. By carefully adjusting the trim settings, pilots can compensate for these inherent instabilities and achieve smoother and more predictable flight characteristics.
Without proper trim adjustments, cheap drones may drift, lose altitude, or struggle to maintain a straight and level flight path. This can make it challenging for beginners to control the drone effectively and can hinder their learning experience.
Trimming a drone allows pilots to optimize its performance within its limitations, making it more responsive and stable. It enables pilots to focus on learning flight maneuvers and aerial photography instead of constantly compensating for the drone’s instability.
Also, factors such as build quality, limited sensor capabilities, and lower-grade drone components can still affect overall stability and flight experience.
Nevertheless, by understanding and utilizing trim adjustments, pilots can make the most of their cheap drones, enhance flight control, and enjoy a more rewarding and enjoyable flying experience.
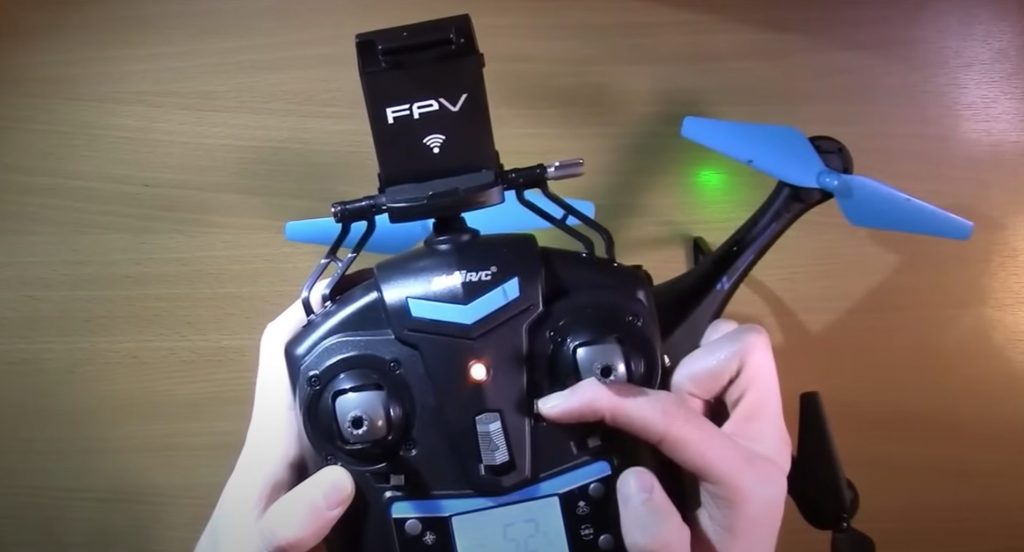
The Trimming Buttons
Trimming buttons, also known as trim controls or trim adjustment buttons, are typically found on the remote drone controller. These buttons allow the pilot to make small incremental adjustments to the trim settings of the drone’s flight controls, such as throttle, yaw, pitch, and roll.
Understanding the functionality of these trimming buttons is important for achieving stable flight and fine-tuning the drone’s performance.
- Throttle Trim Button: The throttle trim button is used to adjust the drone’s vertical stability, primarily controlling its ascent or descent. Incremental adjustments to the throttle trim can help achieve a stable hover without constant throttle input.
- Yaw Trim Button: The yaw trim button is used to fine-tune the rotational stability of the drone. Adjusting the yaw trim compensates for any undesired rotation or drift in the left or right direction.
- Pitch Trim Button: The pitch trim button is used to adjust the drone’s horizontal stability, controlling its forward or backward movement. Fine-tuning the pitch trim helps maintain a level flight path and counteract any pitching deviations.
- Roll Trim Button: The roll trim button is used to adjust the drone’s lateral stability, specifically addressing any drifting to the left or right. Making incremental adjustments to the roll trim helps maintain a straight flight path and counteract any rolling deviations.
When using trimming buttons, it is important to make small adjustments and observe the drone’s behavior after each adjustment. Applying excessive trim changes can lead to overcompensation and result in instability. It’s best to make gradual adjustments, test the drone’s stability, and make further fine-tuning if necessary.
It’s worth noting that the location and configuration of trimming buttons may vary depending on the drone’s model and manufacturer.
It’s recommended to refer to the drone’s user manual to understand the specific functions and usage of the trimming buttons for your particular drone.
Mastering the use of trimming buttons allows pilots to optimize their drone’s flight characteristics, maintain stable flight, and enhance control, contributing to a smoother and more enjoyable flying experience.
How to Trim Your Drone
Here is a step-by-step process on how to trim your drone based on the knowledge you provided:
- Assess the drone’s drifting behavior: Observe and take note of the direction in which your drone tends to drift while in flight. Ensure that you do this in calm weather conditions, as wind can influence the drone’s movement.
- Land the drone: Safely land your drone by smoothly reducing the throttle and gently descending it to the ground. This will prepare the drone for trim adjustments without the risk of any sudden movements or potential damage.
- Identify the opposite direction: Determine the opposite direction to the drone’s drift. For example, if your drone tends to drift to the right, you will adjust the trim in the leftward direction.
- Adjust yaw trim (if necessary): If the drone is spinning to the left or right, make small adjustments to the yaw trim. Note that the yaw gyro is usually accurate, so significant adjustments may not be required.
- Adjust pitch trim (if necessary): If the drone drifts forward or backward during flight, use the pitch trim to make minor adjustments. This will help stabilize the drone’s horizontal movement.
- Adjust roll trim (if necessary): If the drone drifts to the left or right, use the roll trim to make slight adjustments. This will aid in maintaining a level flight and counteracting any lateral drift.
- Repeat and fine-tune: After each trim adjustment, test the drone’s stability by hovering it in place. If necessary, repeat the adjustment process and make further minor changes until the drone can hover steadily without drifting.
- Utilize the drone’s manual: Refer to the drone’s specific manual for any model-specific instructions regarding the usage of trim buttons and functions. This will ensure that you have a comprehensive understanding of how to adjust the trim settings accurately.
By following these step-by-step instructions, you can effectively trim your drone to achieve stable flight and counteract any drifting movements.
Remember to make small adjustments and test the drone’s behavior after each trim change to gradually fine-tune its performance.
When to Trim Your Drone
As a drone pilot, it’s important to know when to trim your drone to ensure optimal flight performance. Trimming should be done under specific circumstances to address any drifting or instability issues.

Here’s when I recommend trimming your drone:
- Before the first flight: It’s crucial to trim your drone before its maiden flight. This allows you to set a baseline for stable flight and adjust any initial imbalances that might affect its performance.
- When experiencing drift: If you notice that your drone tends to drift or deviate from its intended flight path, it’s a clear sign that trimming is necessary. Adjusting the trim settings can help counteract the drift and restore stable flight.
- If Inertial Measurement Unit is not calibrated properly, you must trim your drone.
- Manufacturing Tolerances: When drones are manufactured, slight variations can occur in their components and construction. These manufacturing tolerances can lead to imbalances or discrepancies in flight characteristics. Therefore, it’s important to trim your drone to account for these individual variations and ensure stable flight. Trimming helps compensate for any inherent asymmetry or deviations caused by manufacturing tolerances, allowing you to fine-tune the drone’s performance.
- Wind Conditions: Wind is a significant factor that can affect a drone’s stability and cause drifting during flight. When flying in windy conditions, it’s crucial to assess whether the drone is being impacted by the wind and adjust the trim settings accordingly. Trimming can help counteract the wind’s force and maintain stable flight, allowing you to navigate through gusts more effectively.
- Weight Distributions: The distribution of weight on a drone can influence its flight characteristics. For instance, if the drone is carrying a payload or additional accessories, the added weight can affect its balance and stability. Trimming becomes necessary to compensate for these changes in weight distribution and ensure the drone remains stable during flight. By adjusting the trim settings, you can account for the altered center of gravity and maintain control over the drone.
- In challenging environments: Different environments can impact flight stability. When flying in new locations or in different weather conditions, it’s advisable to reassess and adjust the trim settings accordingly.
Remember, trimming is not a one-time task. It’s an ongoing process to ensure your drone maintains stable flight characteristics.
By being proactive and attentive to signs of drifting or instability, you can maintain precise control and maximize your drone’s performance.
Conclusion
In conclusion, trim adjustments play a significant role in optimizing the performance of a drone.
Properly trimming your drone ensures stable flight, enhances maneuverability, and allows you to have precise control over its movements. By addressing imbalances, drift, and other trim-related issues, you can achieve smoother flights, improved stability, and better overall flight experiences.
Trimming becomes particularly important when flying cheaper or budget drones that may lack advanced stabilization systems. These drones heavily rely on manual control inputs, making trim adjustments essential for maintaining stable flight characteristics.
Understanding common trim-related issues such as drifting, tilting, or inconsistent altitude can help you identify when to perform trim adjustments.
While trim adjustments can significantly enhance flight stability, it’s important to remember that they may need to be periodically reassessed due to factors like manufacturing tolerances, wind conditions, weight distributions, and changes in flight modes or environments.
Overall, taking the time to properly trim your drone is crucial for achieving optimal flight performance. It allows you to maximize control, responsiveness, and stability, whether you’re capturing breathtaking aerial footage, performing complex maneuvers, or simply enjoying the thrill of flying. So, don’t overlook the significance of trim adjustments, as they are key to unlocking the full potential of your drone. Happy flying!